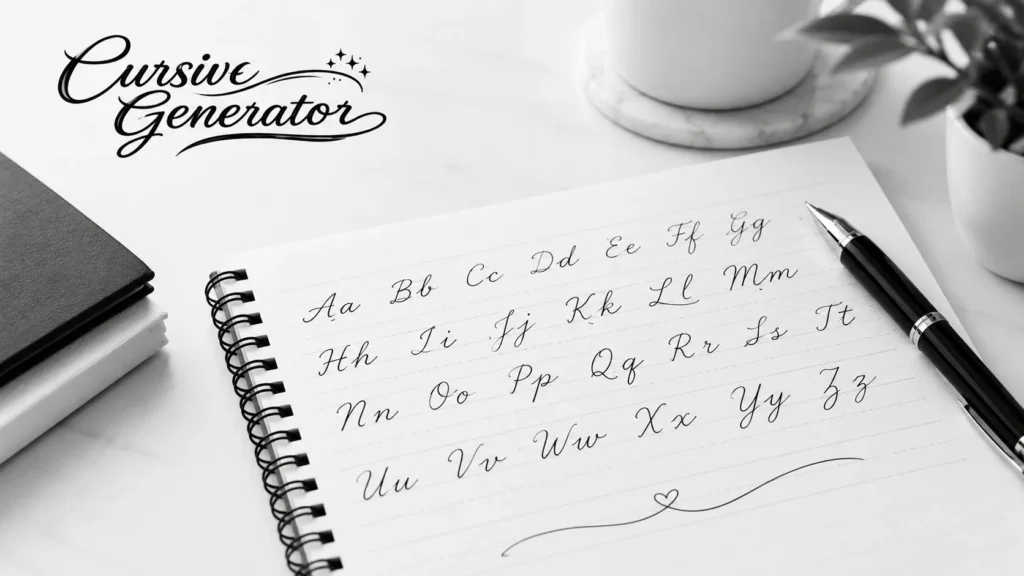
If you’ve ever looked at a beautifully handwritten letter or an old family recipe card and felt a small pang of longing, you’re not alone. Cursive writing, once a cornerstone of every school curriculum, has become something of a lost art. But here’s the good news: it’s making a comeback, and learning how to write in cursive is far easier than you might think.
Whether you want to sign your name with a flourish, journal in a more personal style, or simply reconnect with a skill that feels increasingly rare in our digital world, this guide will walk you through everything you need to know. We’ll cover the basics, the common pitfalls, and practical exercises that actually work, no fluff, just real guidance you can start using today.
What Is Cursive Writing, Exactly?
Cursive is a style of penmanship where letters are joined together in a flowing, connected manner, as opposed to print (or manuscript) writing, where each letter stands alone. The word itself comes from the Latin “currere,” meaning “to run” which makes sense, since cursive letters seem to run into one another across the page.
Cursive isn’t just about aesthetics, either. Historically, it was developed for speed. When you’re writing by hand for long stretches, lifting your pen after every single letter slows you down considerably. Cursive lets you keep the pen moving, which is why it was the standard for personal letters, official documents, and everyday note-taking for centuries.
Why Learn Cursive in 2026?
You might be wondering if cursive still matters in an age of keyboards, voice-to-text, and AI tools. Honestly, it does just not for the reasons it used to.
- Cognitive benefits: Studies on handwriting and motor skills suggest that writing in cursive engages different areas of the brain than typing or printing, which can support memory retention and fine motor coordination.
- Personal expression: Your cursive signature and handwriting style are uniquely yours no font can replicate that.
- Historical literacy: If you’ve ever tried to read a handwritten letter from a grandparent or an old historical document, you know that cursive literacy is genuinely useful.
- Aesthetic and creative value: From wedding invitations to journaling to hand-lettered art, cursive brings a warmth that digital text simply can’t match.
If you want to see what your name or a favorite phrase looks like in various cursive styles before committing pen to paper, tools like a cursive generator can give you a helpful visual reference and inspiration for your own handwriting practice.
Getting Started: Tools You’ll Actually Need
You don’t need fancy calligraphy supplies to learn cursive. In fact, overcomplicating your toolkit early on can actually slow your progress.
| Tool | Purpose | Beginner-Friendly Option |
| Lined paper (wide-ruled) | Keeps letter height and slant consistent | Standard notebook paper |
| Pencil or ballpoint pen | Smooth, controlled strokes | Medium-tip gel pen |
| Cursive alphabet chart | Visual reference for letterforms | Free printable charts online |
| Practice workbook | Structured repetition | Any handwriting workbook for beginners |
| Eraser (if using pencil) | Allows correction without frustration | Standard pencil eraser |
| Online cursive generator | Visualize letter connections and styles | CursiveGeneratorPro.com |
Once you’re comfortable with the basics, you can graduate to fountain pens or calligraphy markers if you want to explore more expressive, stylized cursive—but that’s a later step, not a starting point.
The Fundamentals: Understanding Letter Formation
Before you start connecting letters, you need to understand how each individual letter is formed in cursive. This is where most beginners either build a strong foundation or develop bad habits that are hard to break later.
Uppercase vs. Lowercase Cursive Letters
Cursive uppercase letters tend to be more decorative and complex, with loops and flourishes that don’t always resemble their printed counterparts. Lowercase letters, on the other hand, are generally simpler and form the backbone of most cursive words since we use far more lowercase letters in everyday writing.
A smart approach is to master lowercase letters first, since you’ll use them constantly, and then move on to uppercase letters once your hand has developed some muscle memory for the flowing motion cursive requires.
The Three Letter Groups
Handwriting instructors often break cursive lowercase letters into three groups based on their stroke patterns:
- Loop letters (b, e, f, h, k, l) — These involve an upward loop stroke.
- Hump letters (m, n, v, x, y) — These use a rounded, arching motion.
- Curve letters (a, c, d, g, o, q) — These start with an oval or curved base stroke.
Practicing letters within the same group together helps your hand recognize repeated motions, which builds consistency faster than jumping randomly through the alphabet.
Letter Slant and Spacing
One hallmark of good cursive is a consistent slant—most commonly a slight rightward lean of about 30 to 55 degrees. This isn’t a strict rule, but consistency matters more than the exact angle. Mixing upright and slanted letters within the same word is one of the most common issues beginners run into, and it’s usually a spacing or pacing problem rather than a lack of skill.
Step-by-Step: How to Actually Learn Cursive Writing
Step 1: Trace Before You Freehand
Tracing over pre-printed cursive letters trains your hand’s muscle memory before you’re expected to reproduce the shapes independently. Don’t skip this step, even if it feels elementary—it genuinely accelerates the learning curve.
Step 2: Practice Individual Letters in Isolation
Spend focused time on each letter before trying to connect them into words. Write the same letter 10–15 times in a row, paying attention to where the stroke begins and ends, since that’s what determines how it connects to the next letter.
Step 3: Learn Letter Connections
This is where cursive gets tricky—and where most tutorials fall short. Connecting letters isn’t just about drawing them next to each other; it’s about understanding where one letter’s ending stroke naturally leads into the next letter’s starting stroke. Practice common two-letter combinations like “th,” “an,” “in,” and “er” before attempting full words.
Step 4: Move to Simple Words
Start with short, common words: “cat,” “dog,” “the,” “and.” Focus on smooth, unbroken pen strokes rather than speed. Speed will come naturally once the motion becomes automatic.
Step 5: Write Full Sentences
Once individual words feel comfortable, move on to full sentences. This is where spacing between words, consistent letter height, and overall rhythm come into play. Copying favorite quotes or simple journal entries is a great way to keep practice enjoyable rather than tedious.
Step 6: Practice Your Signature
For many adults learning cursive, the real motivation is developing a distinctive, legible signature. Once you’ve built a foundation with the alphabet, spend dedicated time experimenting with how your first and last name flow together in cursive—this is often the most personally rewarding part of the process.
Common Mistakes (and How to Fix Them)
Even motivated learners run into the same handful of obstacles. Here’s what typically goes wrong and how to correct it:
Inconsistent Letter Size
If your letters vary wildly in height, it’s usually because you’re not using guideline paper or you’re rushing. Slow down and use lined or dotted paper specifically designed for cursive practice until your hand internalizes proper proportions.
Choppy, Disconnected Strokes
If your cursive looks more like connected print than true flowing cursive, you’re likely lifting your pen too often. Try practicing “ghost writing” to build a smoother continuous motion.
Gripping the Pen Too Tightly
A death grip on your pen leads to hand fatigue and shaky, inconsistent lines. Relax your grip, and take short breaks during practice sessions. Cursive should feel fluid, not forced.
Rushing the Learning Process
Cursive is a motor skill, much like learning an instrument. Expecting fluency within a few days sets you up for frustration. Realistically, consistent daily practice for two to four weeks is enough for most people to develop legible, comfortable cursive handwriting.
Practice Schedule That Actually Works
Consistency beats intensity when it comes to handwriting. Here’s a simple structure that works well for most beginners:
| Week | Focus Area | Daily Time |
| Week 1 | Lowercase letter formation | 10–15 minutes |
| Week 2 | Letter connections & short words | 15 minutes |
| Week 3 | Full sentences & spacing | 15–20 minutes |
| Week 4 | Signature, speed, and personal style | 15–20 minutes |
Short, daily sessions are far more effective than infrequent marathon practice, since muscle memory develops through repetition over time, not cramming.
Tips for Developing Your Own Cursive Style
Once you’ve got the fundamentals down, cursive becomes a wonderfully personal form of expression. A few ways to develop your own flair:
- Study different cursive fonts and styles online for inspiration, then adapt elements you like into your own handwriting.
- Experiment with letter flourishes, particularly for capital letters and your signature, once your basics are solid.
- Try different writing tools—a fountain pen produces a very different feel and line weight than a ballpoint, and finding what feels natural to you matters.
- Use a cursive text generator to preview how words or phrases look in various decorative and script styles, which can be a great source of inspiration for hand-lettering projects, invitations, or journaling headers.
Why Cursive Generator Tools Are a Genuinely Useful Learning Aid
If you’ve spent any time practicing cursive, you’ve probably wondered what a word or phrase would actually look like before you commit it to paper. This is where online cursive generators earn their keep—they’re not a replacement for handwriting practice, but they’re a surprisingly effective companion to it.
A cursive generator takes any text you type and instantly converts it into a flowing, connected cursive font you can view, copy, or download. It sounds simple, but the practical applications go far beyond novelty.
Visual Reference Before You Write
One of the biggest challenges beginners face is not knowing what a properly connected word should look like before attempting it themselves. A generator gives you an instant, accurate visual model to trace, study, or compare your own handwriting against—almost like having a reference photo before you start sketching.
Exploring Different Cursive Styles
Not all cursive looks the same. There’s traditional looped cursive, modern minimalist script, bold calligraphic styles, and everything in between. Instead of guessing which style suits your taste, a generator lets you preview dozens of variations in seconds, which is especially helpful when you’re trying to develop your own personal handwriting flair or planning a hand-lettering project.
Practical, Real-World Uses
Beyond learning, cursive generators are genuinely handy for everyday creative tasks:
- Designing invitations or greeting cards with elegant script text
- Creating social media graphics or Instagram bios with a decorative font
- Mocking up tattoo lettering before committing to something permanent
- Adding stylized signatures to digital documents or email sign-offs
- Generating practice sheets with your name or favorite quotes already in cursive form
Speeding Up the Learning Curve
For visual learners especially, seeing text instantly rendered in cursive reinforces letter connections faster than static alphabet charts alone. Pairing a generator with hands-on tracing and practice creates a more complete learning loop—you see it, you understand the stroke pattern, and then you physically reproduce it.
If you want to try this yourself, a tool like CursiveGeneratorPro.com lets you type any word or phrase and instantly see it rendered in multiple cursive styles, a handy first step before picking up your pen.